Godiva ain’t got nothing over my truffles


The simplest things can often be the best.
And I’m glad my husband reminded me of this concept as it came time to select a dessert recipe for Easter dinner this weekend.

To be honest, I have a knack for overcomplicating things for myself in the kitchen. This tendency comes from a lethal combination of enthusiasm, the desire to please and a bit of culinary naiveté.

Case in point: On New Year’s Eve, we hosted our first big dinner party. The most I’ve ever cooked for previously was a grand total of four. Was my first instinct to select a basic menu that I had made before? Nope. Instead, I triumphantly decided to try my hand at a prime rib for all of our 14 guests.

Thankfully, my hubby reigned me in on that idea. Instead, we opted for something a little more manageable: his famous sausage and veggie pasta, and my breaded eggplant. Everyone seemed satisfied. And as an added bonus, I avoided the massacre of an expensive slab of meat.

With this in mind, I picked one of my tried, tested and true recipes for Easter: Super Simple Oreo Cheesecake Truffles. Don’t let the word “truffle” deceive you. These rich, chocolately morsels could not be easier with only THREE ingredients.

Oreo cookies. Cream cheese. Melted chocolate wafer. That’s it. Oh, and did I mention it’s no bake?

The raw ingredients

All you have to do is toss a box of Oreos into the food processor, and combine the crumbs with a block of cream cheese. Roll into bit-sized balls. Refrigerate, then dip into melted chocolate.

The truffles end up looking like something you could have picked up at Godiva. And they are absolutely delicious! Who doesn’t like Oreo cheesecake?

I think my new kitchen mantra will be: keep it simple. I’ll let you know how that goes. More blog posts to come!

Super Simple Oreo Cheesecake Truffles

(I saw this recipe a couple of years ago on the Chocolate Fool blog, but it originated from the great Bakerella)

Ingredients:
• 1 package Oreo cookies
• 8oz. package cream cheese (softened)
• About 5 cups of white or dark chocolate melting wafers

Directions:
1. Break Oreo cookies in half and put them into your food processor. Pulse on high until they are ground into fine crumbs.
2. Place softened cream cheese in a mixing bowl. I cut the cream cheese brick into small chunks. Using a hand or stand mixer on medium speed, add in the Oreo crumbs until combined. Mixture doesn’t have to be smooth. Tiny flecks of cookie give the truffles texture.
3. Roll the mixture into 1 inch balls and place on a parchment lined baking sheet. Refrigerate for at least an hour.
4. Start melting the chocolate over a double boiler. (I boil water in a sauce pan. Once boiling, I place a metal mixing bowl on top with about two cups of wafers. Turn heat down and stir until chocolate is completely smooth)
5. Dip each ball in chocolate, tap off the excess and place onto parchment paper to cool. I’ve tried a variety of different utensils for dipping. I like chopsticks the best. A plastic fork with the middle tines cut out also works. You have to work quickly because the chocolate hardens, and the cheesecake balls get mushy. Work with smaller batches of melted chocolate, it’s easier.
6. Drizzle some contrasting chocolate on top of truffles, if desired.
7. Refrigerate overnight. Enjoy!


Into the food processor
Pre-chocolate dipped truffles. They look so naked…
Now that’s better!
Place them on to the baking sheet, then straight to the fridge!
Voila! A truffle is born!
Yum!

Holy Grail? No thanks. I’ll have pie

Ontario's natural autumn beauty

Ontario's natural autumn beauty

Throughout history, man has embarked upon great quests for discovery. Siddhartha Gautama searched for enlightenment. Crusaders were on a mission to capture the Holy Grail. Christopher Columbus journeyed to find a new world. Following in the footsteps of our predecessors, my mother and I have also pursued a noble search – for the perfect pumpkin pie.

Fall palate at Algonquin Provincial Park

Fall palate at Algonquin Provincial Park

We have searched far and wide, skowered bakeries, farmers markets and grocery stores. What we seek is the gold-standard of fall’s finest pie. That is the perfect blend of nutmeg, cinnamon, and cloves; a pumpkin filling that is moist, but not custardy; and a crust that is buttery flakiness personified.

My photography major sister is on a quest of her - for the perfect fall photo!

My photography major sister is on a quest of her own - for the perfect fall photo!

We’ve tried pricey gourmet pies, which have almost always been a disappointment. We’ve also cracked open boxed pies from every major supermarket chain. And interesting to note, the closest we’ve come to pumpkin perfection was the Dominion house-brand pie. Sadly, when Metro took over the chain, the delicious and well-price pie nosedived, just like virtually everything else about the grocery store. (Fresh produce and shelves of packaged foodstuffs were cut in half to make room for aisles of frozen foods and a massive prepared food counter. And somehow, they always manage to run short on staple items like skim milk and white rice. Yes, that’s right, rice. But at least they have soggy, bland ready-to-serve perogies).

Over the past few years, we’ve bounced from pie to pie at Thanksgiving. Though, even the whipped cream we dollop on our slices can’t mask our feeling of emptiness, and longing for that perfect piece. This year, however, I decided to take a slightly different approach. Rather than leave the pumpkin pie quest up to fate, I was going to take matters into my own hands and bake my own pie.

Pumpkin puree: where it all begins!

Pumpkin puree: where it all begins!

I opted for a pumpkin cheesecake recipe from Martha. I’ve had good luck with my Oreo version, and figured it could only get better with some pumpkin puree and a little pumpkin pie spice. The recipe itself was pretty easy. The filling was just a combination of cream cheese, sugar, a bit of flour, pumpkin puree, pumpkin pie spice, vanilla, salt and eggs. Didn’t take too long to blend everything together. The crust, which I changed slightly from the originally recipe, was equally simple. Dump cookies and sugar in the food processor, then mix with a bit of butter.

However, the biggest hassle associated with this recipe was the monolithic baking time. Each cheese cake had to be in the oven for an undisturbed three hours! Forty-five minutes of actually baking, then two hours sitting in the oven with the heat off. Supposedly, this is needed for the cheesecake to set. But I’m not sure that I buy it, since my Oreo recipe called for no such thing.

For the cookie crust

For the cookie crust

I certainly gave my oven a workout, since I made the recipe three times over the past several days, yielding a whopping total of six cheesecakes! No, we didn’t have an army over for Thanksgiving dinner. I made one for a bake sale, one for my boyfriend’s mom, one for my neighbour, one for our dinner, one for back-up and a set of mini-cheesecakes for fun.

Cookie crust, before entering the oven

Cookie crust, before entering the oven

The end result was pretty tasty. Everyone seemed to like the spicy pumpkin flavour, with an undertone of sweet creamy cheesecake. And, to satisfy our craving for the traditional, my aunt baked an absolutely delicious pumpkin pie. It was exactly the kind that has been so elusive to us in recent years. As such, I think I will be borrowing her recipe next year!


Two good looking, tasty pies: one by me and one by my aunt!

Two good looking, tasty pies: one by me and one by my aunt!


Pumpkin Cheesecakes

 *Recipe makes two cheesecakes

 Crust

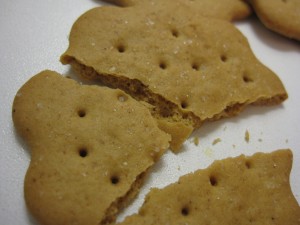
  • 2 cups of ginger snap cookie crumbs per cheesecake (original recipe calls for graham crackers)
  • 1/4 cup sugar
  • 4 tablespoons unsalted butter, melted


  • Filling
  • 4 packages (8 ounces each) bar cream cheese, very soft
  • 1 1/4 cups sugar
  • 3 tablespoons all-purpose flour
  • 1 cup canned pumpkin puree
  • 2 tablespoons pumpkin-pie spice
  • 1 tablespoon vanilla extract
  • 1/2 teaspoon salt
  • 4 large eggs, room temperature
  • Whipped cream, for garnish if desired

Directions

  1. Preheat oven to 350 degrees, with rack in center. Assemble a 9-inch non-stick springform pan, with the raised side of the bottom part facing up.
  2. Make the crust: Place cookies and sugar in food processor. Blend until cookie crumbs are fine. Remove from food processor and mix in butter until moistened. Press cookie mixture firmly into bottom of pan. Bake until golden around edges, 10 minutes.
  3. Make the filling: With an electric mixer, beat cream cheese and sugar on low speed until smooth; mix in flour (do not overmix). Add pumpkin puree, pie spice, vanilla, and salt; mix just until smooth. Add eggs one at a time, mixing until each is incorporated before adding the next.
  4. Place springform pan on a rimmed baking sheet. Pour filling into springform, and gently smooth top. Transfer to oven; reduce oven heat to 300 degrees. Bake 45 minutes. Turn off oven; let cheesecake stay in oven 2 hours more (without opening).
  1. Remove from oven; cool completely. Cover with plastic wrap; refrigerate until firm, at least 4 hours. Unmold before serving.
  2. Garnish with whipped cream, if desired.

Freshly Brewed Cake

I don’t condone road rage, but I certainly understand it. You’re tired. You’ve worked an eleven-hour shift – on a Friday, no less. You have a sinus cold that is causing the right side of your face to throb. You’ve run out of Kleenex. There’s construction – everywhere. There are lane reductions beyond every street corner, and no one will let you merge. The highway onramp is backed up for blocks, and when you do make your way on, traffic is blazing at a steady rate of 5 kilometres per hour. And then an airport limousine cuts you off. So yes, I can see how even the most mild-mannered person can get a little worked up during a rush hour commute.

To release all that pent up frustration, some people yell, others curse, and some favour the one-finger wave. I, however, dealt with my Friday afternoon frustrations in a different way: I baked them out. And man, did it feel good!

For the past week, I’ve been sidelined from the kitchen because of a cold. So, I was really baking with a vengeance. I guess that’s why I tackled two birthday cakes and a batch of mini cheesecakes in one night.

Everyone seemed to like the crown of Oreos

Everyone seemed to like the crown of Oreos

This weekend we held a tri-birthday celebration for my sister, grandmother and uncle. I volunteered to bake my uncle’s favourite oreo cheesecake, which I blogged about a few weeks ago. This time, I made both mini-cheesecakes and a full-sized cake. I used the exact same batter, this time pouring it into an oreo-lined spring form pan and baking for about 35 minutes.

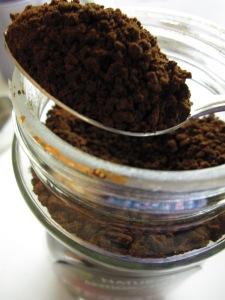
Instant coffee adds intense flavour

Instant coffee adds intense flavour

I also tried my hand at a great recipe from The Pioneer Woman for a coffee cake. Now, this wasn’t your traditional crumbly confection. Instead, it was literally a coffee-flavoured layer cake. It was a pretty simple recipe, and the end result was just delicious! The cake was moist and rich in coffee flavour. The icing was flecked with granules of coffee, and it was fluffier and tastier than any other recipe I’ve tried thus far.

The makings of what would become my favourite icing

The makings of what would become my favourite icing

The Pioneer Woman beautifully illustrates each step of her recipe with photos. This way, you can easily follow along and tell if something is amiss with your version of the dessert. Luckily, I got through the whole recipe without a glitch.

In the end, both cakes were a hit. And after all the dishes were done and the candles blown out, my angry Friday afternoon commute was no more than a distant memory.


Sporting a fresh coat of frosting

Sporting a fresh coat of frosting


Coffee Cake – Literally

For the Cake

2 cups flour
2 cups white sugar
1/4 teaspoon salt
2 sticks (1 cup) regular (salted) butter
3 tablespoons instant coffee (I used Folger’s Crystals)
1/2 cup buttermilk
2 eggs
1 teaspoon baking soda
2 teaspoons vanilla

For the Icing

1 1/2 sticks (3/4 cup) regular (salted) butter
1 pound powdered sugar
1 to 2 tablespoons instant coffee
1/4 teaspoon salt
2 to 4 tablespoons heavy cream (add as needed)

I can’t do the instructions justice if I retyped them without The Pioneer Woman’s photos. So check out her fully illustrated recipe here.

Coffee cake, freshly brewed!

Coffee cake, freshly brewed!

Temptation Thy Name is Oreo

When I went for my jog last night, temptation rested heavy on my shoulders – literally. After all, I was hauling a knapsack full of Oreos and cream cheese for most of my five kilometre route. No, I wasn’t using some kind of weird reverse psychology exercise tactic. Since my run takes me by a grocery store, I thought I’d make a pit stop to pick up some baking ingredients and save myself an extra car ride.

The cashier had me pegged right away. “She has to be making cheesecake. Can’t even wait for a sale.” I guess it was a reasonable assumption, considering I was buying four packages of cream cheese and three packages of Oreos.

The prospect of plain old cheesecake isn’t really enough to get my baking juices flowing. But when you add Oreos to the equation, I’m sold! Oreos are my favourite store bought cookie. One of the classic comfort foods, these cream-filled confections are deliciously versatile. They can be dunked in milk, crumbled in crust or blended in ice cream. And in this case, they’d be stirred into cheesecake batter.

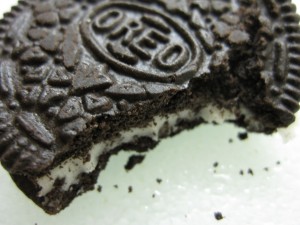
Oreos more than stack up to the competition

Oreos more than stack up to the competition

Couldn't resist!

Couldn't resist!


I found the recipe for Mini Oreo Cheesecakes on one of my favourite baking blogs, Pink Sugar Desserts. This blog is an absolute treat, with beautiful photos and wonderful dessert ideas.

The recipe was fairly simple. Blend cream cheese, vanilla, sugar, sour cream and eggs. Unfortunately, I had to stop mid-beat and rush off to the grocery store at 10 o’clock at night, when I saw our egg drawer was empty. Once the elusive eggs were blended, the mixture was poured into cupcake liners and tucked into the oven.

Whole cookie crust

Whole cookie crust

Sadly, I overcooked my first batch. In my own defence, I did follow the recipe’s cooking times. But I guess my convection oven had other ideas. At least the second batch came out ok!

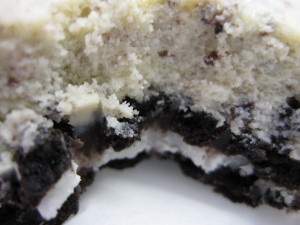
Despite browned tops and slightly deformed shapes, the mini cheesecake tasted pretty good. They were rich and creamy, and best of all, they had a crunchy surprise. Buried beneath the batter was a whole Oreo, which served as the crust. This recipe is a keeper, but next time, I’m going to keep a more vigilant eye on my oven!

Here’s the recipe, which originally appeared in Martha Stewart’s Cupcakes: 175 Inspired Ideas for Everyone’s Favorite Treat.

Mini Oreo Cheesecakes

  • 4 packages of cream cheese (250 grams each) at room temp
  • 30 Oreo cookies plus 16 extra crushed
  • 1 cup of sugar
  • 1 teaspoon of vanilla
  • 4 eggs at room temp
  • 1 cup of sour cream
  • Mini Oreos for garnish, if desired


  1. Preheat your oven to 275 degrees and line a muffin pan with cupcake liners.
  2. In a large bowl blend together the cream cheese and vanilla until fluffy and smooth, remembering to scrape down the sides. Pour in the sugar and blend well. Add in each egg one at a time beating until blended. Pour in the sour cream and continue to mix. Stir in the crushed Oreo bits and blend well.
  3. Place an Oreo cookie in the bottom of each liner and spoon the cheesecake mixture over each Oreo almost all the way to the top of each well.
  4. The original recipe suggested baking in the preheated oven for 12 minutes, rotating then baking for 12 more or until set. However, my convection oven only needed a 10-11 minute baking time for each stage.
  5. Cool in the pan for 5 minutes then on a rack until cooled completely. Keep in the fridge for at least 4 hours or overnight before serving. Garnish with mini Oreos, if desired.
A little goopy, but still good!

A little goopy, but still good!

Don't forget to let the cheesecakes set overnight

Don't forget to let the cheesecakes set overnight

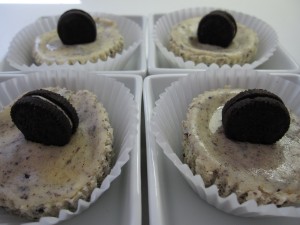
A tasty quad

A tasty quad

Love the cookie crust!

Love the cookie crust!